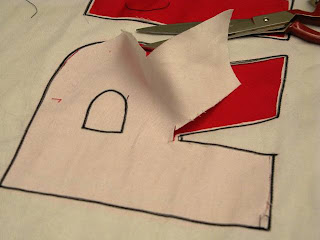
I used a data projector and projected the lettering that I needed onto a wall, hung the fabric on the wall and then traced the outline onto the fabric. You could easily just draw your shape or lettering freehand or use carbon for this step.
Cut a piece of fabric a bit larger than the lettering. Make sure you have enough room to pin around the edges for sewing.

Attach to the underside and then straight stitch the two pieces of fabric together using a straight stitch. I found it easier to pin from back to front and then front to back, remove the pins and then sew. Of course removing the pins before you sew over them.

From the back you can see what the stitching looks like when finished.

Trim the threads and then trim the backing fabric using a sharp pair of scissors, make sure that the trim is nice and close to the stitch line.

You might have to go around the lettering a number of times before it was nice and close to the line. Once you have finished the back, cut out the middle of the front letters. Use a stitch unpick to create a rip and then get your scissors in there to finish the job.

Again, don't worry too much about how close you get on the first cut, you can always go back and trim closer.

Once you have finished your trimming, zig zag around the outside of the letters to get a nice finish.

And here is the finished product with a messy work bench as the background!

Voila!


No comments:
Post a Comment