Monday 28 February 2011

Made by Joel

Made by Joel, kept me sidetracked for a while!

Lots of ideas and links to other interesting web sites. The thing that I like the most about the projects that Joel makes is that they are simple and yet complex.


One project that captured my attention was the hanging wall box Aquarium. I've been trying to teach Victoria how to sing The Beatles Octopus' Garden. Walnut Boats are another project we might try given the frequency of our Pear, Blue Cheese and Walnut Salad in our house at the moment.

One of the most popular "toys" that we have made in the last few weeks has been the "egg people". Take an eggshell (empty) and the insides from a toilet roll. Paint, stick things on and voila you have an Eggweena or an Eggbert .. hours of fun! We did have to replace the head for a polystyrene one as the actual egg shell didn't pass the "Victoria" test!

I am very much looking forward to Joel's new book coming in May 2011. I think that there will be lots of interesting projects in there for us to play with for Victoria and her little brother Nicholas.

Have you made anything practical like Joel's projects for your little ones?

Friday 25 February 2011

Photoshoping Victoria

Not quite in the mood to do my Etsy Friday Finds today, so here is a lovely photo of my daughter. Both before photoshop (left) and after (right)


Taken at a photoshoot when Nicholas was still in my tummy, we had taken a brief break to do Victoria's hair for some Mummy/Tori/Belly shots and "snap" the picture was taken.

When I first saw the picture I thought that a lot of Photoshop had been done, but looking at the before and after, it seems that not that much has been done at all. The funny thing about the picture is that it looks entirely staged, when in fact it was not.

Thursday 24 February 2011

My creative space ...

My creative space this week has been mostly taken up with strategies for dealing with baby. As with most newborns, they like to be near, so I stole an hour the other night and whipped up this baby sling using instructions via the following site, Jan Andrea at home on the web. The pattern I used was the tube sling pattern and there is an excellent link to a PDF that talks about positioning baby in it.


Being a fabric hoarder, I had lots to choose from but decided on the lovely Ouka by Kokka in black and purple. It is a medium weight Japanese print and using it for something like this is a complete indulgence. But I figured if it didn't work out, I could chop it up for a quilt.

Have you ever self induged and made something for yourself from expensive fabric?

Interested in more creative spaces, check out Kootoyoo ...

Tuesday 22 February 2011

Colour Wheel Quilts

I love quilts with lots of colour and I love seeing colour wheel quilts.

It goes with my whole practical angle on quilting. I guess that is why I love the concept of Oh Fransson's Paintbox Quilt or books like City Quilts.

Being house bound, found me searching for colour wheel quilts and I came across a few that I think are rather gorgeous!

Gorgeous Queen Size bed quilt by Knit Stitch Click. I love the way they have quilted this one with the radius of the colours.

Judy Villet has made this gorgeous Quilt called "Hue". Her homepage is here, but I got this image from the Common Threads Vancouver Web Site. The only thing that I don't like is that the stipling on the black is not darker.


Colour Wheel Ticker Tape Quilt by Flossieblossoms. This one looks like an idea stash buster. The colours are laid on with applique and I love the scrappy feel of it. The blog is gorgeous as well .. I have definately become a fan!


Not quite a colour wheel, but a colour palette quilt. I love the scrapy nature of this one and the fact that they used a $3 walmart sheet as backing.


via flickr

Have you attempted one of these colour wheel quilts?

I'd love to know how it turned out!

Sunday 20 February 2011

Yet another Kaotic weekend

It was yet another chaotic weekend here at Konstant Kaos with the much anticipated arrival of our son, Nicholas Ernst.


Born on Friday 18th February at 18.51pm at the Royal Women's Hospital in Melbourne, weighing 3.864 kgs and a length of 52.5 cm.


His big sister is very excited that she has a little brother.


Grandparents are overjoyed that we made it through the jumpgate in one piece!


Mum is just enjoying the fact that the second time around it is a little less stressful, but she is not looking forward to the sleepless nights!

Grampians Texture 26th February

If you are looking for some creative release next weekend, check out the Grampians Texture that is happening next weekend.


23 February - 3 March 2011
Grampians Texture
Halls Gap - Western Victoria
Come and join other textile/art enthusiasts for the annual Grampians Texture: part festivalpart forum.
Fifteen tutors offering 2 to 4 day workshops

Friday 18 February 2011

Etsy Friday Finds

Given that I am 10 days overdue .. I found myself looking at nursery mobiles this week.


Hanging Owl Mobile
by CarrotFever
This mobile is so cute!


Hope that you enjoyed my Etsy Friday Finds

Have you found anything lovely on Etsy lately?

Thursday 17 February 2011

My creative space ...

I really should rename this post, my daughters creative space ...


She wanted a paint set, so hubby headed off to Kmart and scored a water colour and pencil set for $15 with wooden box (who makes profit on this again?).

Sometimes she draws things and paints them, other days I draw things and she paints them. It has been HOURS of fun for her! Let's hope she continues to find this creative space attractive when baby arrives.

If you want to play as well, head over to Kootoyoo

Wednesday 16 February 2011

Monochromatic Sampler: Block Seven Tutorial

You could probably do this block in a variety of ways. Unfortunately I think I chose the most wasteful way! If you have ideas, please post a comment on this blog entry!


Cut
  • 4 blocks of 3 1/2 inch squares in black
  • 5 blocks of 3 1/2 inch squares in white
Creating the centre block

Take your squares and create three rows of patches.

Press your seams, then line up your seams and construct the centre diamond shape.

You should have a centre block that looks something like this.

Rotating the centre block into Diamonds

What I wanted to do is turn the blocks 45 degree.

Cut two squares measuring xxx and cut them so that you have four triangles. We are going to use these to rotate our block.

Sew them onto each side of your block making sure that they are in the middle. There is a bit of slack with the size of the triangles so that you can trim them down later.


Once the additional triangles are sewn on, trim the edges to make another square using 1/2 an inch allowance between the edge of the black squares (see the diagram).

The trimmed down square should be nice and neat.

Border around the Diamonds

Cut a strip of 2 1/2 inches by the width of the fabric in White.


Once the sides are sewn onto on your diamonds, press and trim.


Voila, another block done, two more to go!

Are you making these blocks as well? Add your pictures to the Flickr group.

Tuesday 15 February 2011

Spiro Quilt

I was quite excited when I came across this quilt in my travels.


via Flekka Journal

Since doing my spiral block, I've been on the look out for quilts using the same techniques.


via Candlewood Quilts

This one is called a Spiral Log Cabin Quilt by Candlewood Quilts.


via Cheryl's Teahouse

Take a look at the blog entry for this one. Cheryl does exquisit work and I love the colour combination that she has used.

Monday 14 February 2011

Happy Valentines Day!

Whilst some people talk about Valentines Day as a "Hallmark Holiday", the choice is yours ...

Sometimes we need a reminder to show gratitude to the ones that we love.

How will you show gratitude? Will you show it with a note in their lunch box?


Or perhaps with a lovely dinner? Or with a hug?

There doesn't have to be a card involved.

We should all practice gratitude every day. If you haven't read any of Sarah Ban Breathnach's work, then it is worthwhile hunting up.

Sunday 13 February 2011

Modern Quilt Guild Monochromatic Challenge

I was excited when Scarlett from Craft Gossip emailed me to tell me that the Modern Quilt Guild is running a Monochromatic Challenge .. *giggles*


Unfortunately this competition is only open to US Residents, but I am chuffed that my tutorials are timely for at least someone out there!

Saturday 12 February 2011

Westernport Quilt Show

Looking for something to do next weekend?

The Westernport Quilters have their annual Quilt Show at the Westernport Festival
February 19th & 20th 2011


image via Westernport Quilters

As taken from their web site:

"On the picturesque Hastings Foreshore, the Western Port Festival Program has something for all members of the family. There are events to entertain all ages.
Including displays of Quilts, Art, & Handcraft

Demonstrations in Hastings Hall, High Street, Hastings

Westernport Quilters Inc. is proud to be a part of this free show and we hope you will come along and enjoy this community project. You could also be the lucky winner of our beautiful raffle quilt.

Why not enter one of your own quilts in the show, or take up the
challenge to “Dress Miss Westernport”.
Again this is all free of charge and a great opportunity to display your work. You do not have to b a member of Westernport Quilters to enter. There are no “Quilt Police” and prizes are awarded by way of viewers’ choice. "

Sounds like a great excuse to take a nice drive down the coast and indulge in some quilty goodness!

Friday 11 February 2011

Monochromatic Sampler: Block Six Tutorial

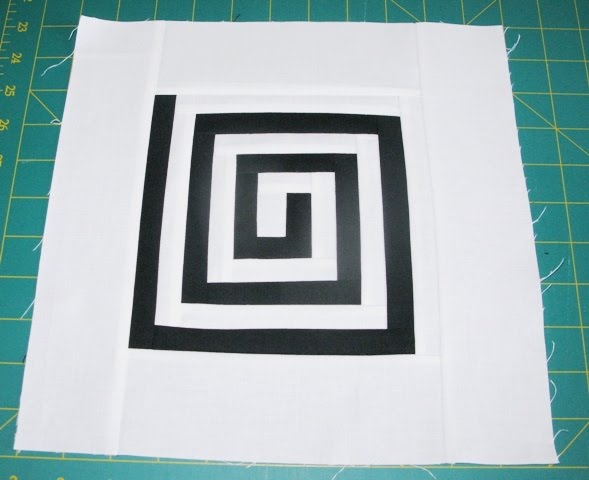
The technique used for this block could very well be used for a black star on white fabric block. Although the original design has three starts on white, when I was putting this block together I felt like I wanted a bit of Konstant Kaos in the quilt.

I wanted to play around with a different applique technique this time. I've done raw edges and reverse applique, this one uses Freeze Paper.


Cut our fabric:
  • 10 1/2 inch by 10 1/2 inch square in Black
  • One star in colour of choice
To get the star shape I used a Wingding in MS Word and enlarged it to 650 font size (re-adjusted the font style to outline) then printed it out.

Applique Shape

Cut some Freeze paper the size of your star or stars. We are going to use the Freeze paper to fold over and press the edges of the star so that there are as little raw edges as possible.

Another quilter at the Melbourne Modern Quilt Guild showed me this technique. She used it for hexing and used a clover mini iron press to press her hexes rather than baste her them before hand sewing them together. I want to try this with the Penrose Tiles Quilt. This does mean that you have to cut freeze paper in hex shapes, but I am sure that there is a paper punch out there somewhere that does it!

Cut your freeze paper star and start to gently press the edges over with no steam. Upto you whether you trim down the corners or fold them over. For this one, I trimmed the corners out so that it wouldn't b so bulky as an applique.


The result should be an applique with nice crisp lines.

Carefully remove the star from the Freeze paper, it should hold it's shape for long enough to sew it onto your fabric.


A bit of fray lock can be used on any raw edges, alternatively, you could have folded those edges over.

Attaching the applique

I used a strip of double sided interfacing around the perimeter of the star to lock the pressed edges in place. Alternatively, you could have cut out a star from double sided interfacing.


Remove the paper backing of the double sided interfacing and press in place onto your backing fabric.


Around the edges I used the blanket stitch on my sewing machine, but you could just as easily zig zag or straight stitch.

How are you going with the tutorials? I would really love some feedback on whether the instructions are clear and concise.

Etsy Friday Finds

Some more gorgeous stuff to tempt you ..

From the desk of Rubber Stamps
by presentandcorrect
I think these are just gorgeous!!


Sakura hair pin
by howlindoggie
My hair is quite long, I love gorgeous hairpins.


Year of the Rabbit Nursery Print
by LittleEdenStudio
My baby will be a Rabbit, so it is fitting that I include this in my Etsy finds!


I hope you have enjoyed my finds this week!

Thursday 10 February 2011

Monochromatic Sampler: Block Five Tutorial

This block took the longest for me. It was by far the most fiddly but also the most rewarding when it was finished.


Cut
  • One 2 1/2 inch width strip of fabric the entire fabric length (42") and then cut in half into two 1 1/4 inch strips in White.
  • Cut the same strips, two 1 1/4 inch strips of the entire fabric length (42") in Black
Row One

Due to the nature of this block, it is important that you iron, measure and trim in between each row to make sure that everything is even. Once you have sewn a row, make sure that you measure the strip at 1 inch after you sew them together. You will be able to tell easily if your measurements are out.

Start off with two small pieces of fabric:

  • 1 1/4 inches by 1 inch in White.
  • 1 1/4 inches by 1 inch in Black.


Row Two

The general method for spiral construction is a "top and tail" construction. You can either choose to cut each piece by hand and sew the spiral together or work off a length of fabic and trim in between each row.

Row Three

When constructing I would roughly measure the length of my strips, sew both sides at once and then iron, measure and trim to length.


Continue adding strips to the top and tail of the spiral until you have 11 rows of the spiral.

Final Row


By the time you get to the final row, you should be feeling quite happy at your spiral. Fiddly but rewarding .. right?


Sashing

Once you have your spiral finished add some sashing to make it really pop!


Voila, another block finished, four more to go!


I could imagine this technique being used with jelly roll strips to create quite an effective quilt. I noticed on the Moda web site a few days ago, someone had made a similar quilt! They have called it a Serpentine Quilt.

A big thank-you goes out to Leanne who actually spotted the pattern in my Japanese Quilts book (although these instructions are all mine because the book didn't provide any clear instructions) and the lovely Beky who actually got me the book in the first place for my Birthday last year!