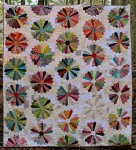
When working a piece of patchwork there are some big decisions that need to be made.
Do you create each four patch block, sash it and join it together (A) or sew half the sash to the four patch block and run a strip along the top of the blocks (B)?
Certainly (B) is a lot faster in the short term, but consider the advantages from doing (A).
Option A
If you make each individual block you can measure and trim with your rotary blade to tidy up any uneven sewing. When sewing the sections together make sure that your seams line up.
For ironing, I pressed the seams open on the initial four block design and then with the grey sash, I pressed the seam into the block to add a bit of bulk. The key to seams is being consistent throughout the whole project, however, many would argue that seams need to be pressed open.
Option B
The B option, even through it seems easier, can lead to misalignment of seams running from the top to the bottom of your quilt.
I tend to like to construct each row using the method described in A, it gives me a chance to line up all the blocks and the extra seam at the top of the row allows me to line up the next row more easily.
It also means that you can either construct it as a row of blocks or a cluster of four blocks.
When I was putting this quilt together, I initially created a cluster of four blocks to see what the design looked like. This picture looks a bit squeegee because I haven't trimmed or steamed out the blocks yet to get them to align properly.
One of the reasons why I am reluctant to sew with my son around is because when doing patchwork you are continually sewing and ironing. So the iron is on all the time; set at cotton with lots of steam.
Nicholas is quite uneasy on his feet and when he starts wandering around the house, looking for cookies or a drink, he wants to get involved in what I am doing; which means moving parts on the sewing machine and a hot steam iron.
My anxiety levels go through the roof and sewing no longer becomes the joyful escape that it once was many years ago. But with him out of the house I can relax and enjoy the process, even though I tend to work like a demon to get my projects finished!
Ironing
The ironing is the most important part of making a quilt. You can use a hot steam iron to stretch fabric to line up seams or shrink fabric to meet a seam.
Creating each of the four patch blocks with grey sashing individually means that there is less likelihood of seams looking a bit off. You can steam and trim each block using your rotary cutter and ruler and make sure that things like up; as you go.
If the seams are a not straight, spray the block with water and use the steam iron to straighten them up. Iron until dry and press the back seams open. If you are pinning together blocks to sew them together and they are not aligning properly, pin them and then give the cotton a shot of steam to either stretch or shrink the fabric.
Here are some links about ironing and patchwork.
End of the row sash
Once you have finished a row, add the end sash.
Create 5 rows that look like this:
On the sixth row we will add the bottom row of sashing.
The inside of our quilt should look like this:
Press with an iron and trim the outside of the quilt ready for the border sash.


