Thursday, 3 February 2011

My Creative space ...

How often do you clean your iron?

While working on one my Monochromatic Sampler my iron decided to spew brown gunk all over one of my beautiful blocks. Not a good look when you are dealing with black and white fabric. So blogging about my blocks has come to a grinding halt until I can wash the block in question and clean my iron.

So I spent a few hours the other night cleaning my iron. I could have gone out and bought iron cleaner, (or even a new iron) but I wanted to see if I could use what I had in the house.

In the past if I accidently went over the wrong side of the iron-on interfacing, I would use a cloth with Eucalyptus oil to remove the sticky bits. This seemed to work well, but then left a slight residue. Hours of continuous use of the iron while sewing, had left the base plate with a brown residue on it (and inside it!). Researching online, I went with half vinegar half filtered water poured inside the iron to clean out the steam ducts.

While the iron was hot, I continued with the Eucalyptus oil and rag and did some hard yakka trying to remove some of the residue. It was a slow process. Some more research revealed that vinegar on a rag might work, so again, some hard yakka was involved trying to remove the brown residue. This worked moderately well, but not fast enough for my liking. I ended up using alternatively, pure vinegar and bicarb soda and it worked a treat. The burnt interfacing and material came away so easily with the bubbly reaction between the bicarb and the vinegar and it didn't seem to harm my non-stick surface.


As you can see, the base plate looks like a new iron and it works wonderfully. I used a rag on tongs to clean the iron while hot and an old toothbrush to get into the steam ducts. Once clean, I cycled the iron through some more vinegar/water and then clean distilled/filtered water to clean out the junk. Now I have a new iron (and a bin full of rags with brown gunk on them)!
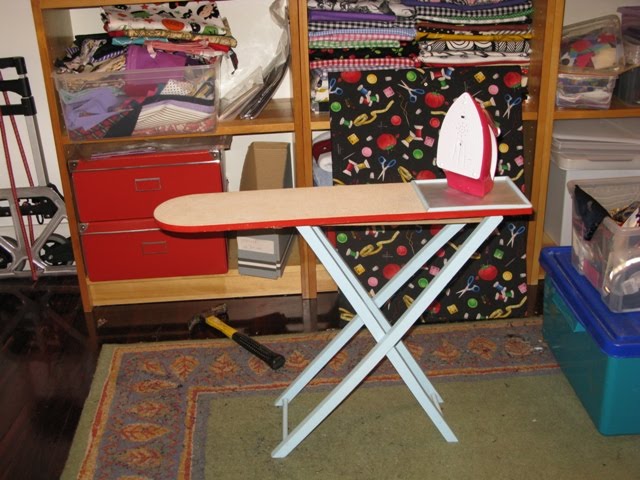


Of course, while doing this Victoria was hard at work cleaning her iron as well .. with tongs and a rag! The ironing board that she has once belonged to me when I was her age.

Of course, Tori doesn't normally play in my sewing room when I am using my iron. An accident just before Christmas 2008, has left her with a scar on her foot the size of a 50 cent piece. While endeavouring to have a "handmade christmas" she snuck up from behind and pulled on the iron cord and a hot iron fell on her. Bouncing off her left arm, left thigh and then it landed on her left foot. Quick action by Mum and Dad had her covered in wet towels and ice packs and at the Royal Childrens Emergency in 10 minutes.

In the picture below you can see her foot all bandaged up. And following the accident, we had 6 months of treatments in at the Royal Children's Burns unit. Now I never leave her in my room unattended and I tend to sew when there is no risk of her coming to "help me".


Now that my iron is clean, I can get back to the task at hand. I am working to a deadline, my due date is next Tuesday .. will I make it?

For more creative spaces this week, check out Kootoyoo!

Wednesday, 2 February 2011

Jimmy McBride - Stellar Quilts

I was chatting to a friend on the phone this morning about quilting and patchwork and how the "average" customer just won't pay "the real price" for a patchwork quilt. We can probably blame our marketplace which is swamped with cheaply made products from sweatshops in asia.

In my restricted state, surfing the web, I came across this Jimmy McBride who makes different kinds of quilts and isn't afraid to charge for them.

This quilt is called Phobos V2 (one of mars moons) and is hand and machine quilted. It would have taken hours and the $3,800 USD price tag reflects it's uniqueness.


via etsy

I know someone would kill for a meteorite quilt like this one ...

The M64 (The Black Eye Galaxy) is quite impressive as well! At $2,200 USD, you'll have to wait a while to take receipt of this masterpiece as it is being included in an exhibition in Norway.


via etsy

Something a bit more affordable are the space battle pillows ... aren't they cute!


via Jimmy's etsy shop

Such a different kind of quilting with so much expression. I love the combination of applique, hand quilting and machine quilting. I wish one of the Australian Quilt Exhibitions would bring his work out here for us to look at.

Jimmy has an etsy shop StellarQuilts with lots of one off creations in it and a facinating blog that shows the process that he has used for some of his quilts.

enjoy!

Sunday, 30 January 2011

Monochromatic Sampler: Block Two Tutorial

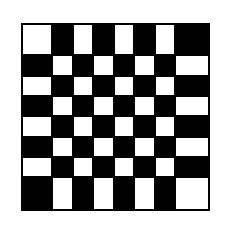
Ideally it would have been great for this block to have been the size of an actual Chess Board, But that would have either made the patches too fiddly or the blocks too big.


Preparing the strips

Take two 2 1/2 inch strips of fabric, black and white, and then cut them down the middle to make two 1 1/4 inch strips. Alternatively you can of course use scraps to make this block from all your other blocks at the end of the quilt.

Press and splice

Sew the two strips together, press and then cut in half and then sew together again, until you have eight alternating fabric strips sewn together. Remember to press, measure and trim if needed inbetween sewing each time to make sure that you get the size of your strips accurate. Each strip should be 3/4 inch thickness. I ended up pressing the seams towards the black rather than flat. It gives the black patching a raised look.

Pin and sew


Once you have a strip of eight together, slice them so that you have rows of 1 1/4 inch strips. I tend to pin from the centre of the row outwards. If there is a lot of difference in the seams, then try another piece. I only had to unpick two of my rows to make them line up.


Once you have your chess board constructed, make sure that the last row is 1 inch thick all around with your ruler.

Sashing the block

Once finished, sash the block in one 2 1/2 inch strip. the block itself might be a little larger than your first one, but don't trim just yet. Wait until we have all our blocks done first before we trim down.

An alternative way of construction might be to use Oh Franssons! Quick-piece tiny squares method of using interfacing to construct the chess board.

Are you joining in? Get your Monochromatic Sampler icon here and join upto the Flickr group and post your blocks.

Now I am off to clean my iron!

Friday, 28 January 2011

When was the last time you did this?

Completely engrosed yourself in a task


Finding yourself lost in the moment


Without care for who was watching


Feeding a guilty pleasure


Finding that true moment of bliss


When was the last time you did this?

Thursday, 27 January 2011

My creative space ...

I wanted to do an uplifting post using this image (below), which show the blocks I have finished so far for my Monochromatic Sampler Quilt. As you can see I have changed my design a little and the blocks are starting to take shape quite nicely. As I complete blocks I pin them to my bookcase so I can see them all together.


But the reality is that I have spent the last two days on these (below), having discovered that I had not one but two infected teeth in my mouth which resulted in a marathon 1 1/2 hours of dental surgery today to remove the infection and plug them back up again.


The pain was so intense that I ended up at the Royal Women's last night for three hours for pain relief (morphine) and they monitored the baby to make sure that there was no side effects from what they gave me. I managed to get into my dentist today and hopefully in a few days time the swelling will have gone down and I can enjoy the last few days or week of my pregnancy!

I think that a double root canal should be on every new Mum's "to do" list as they are approaching the 39 week mark .. don't you?

Take a look at some other creative spaces over at Kootoyoo's blog.

Wednesday, 26 January 2011

Monochromatic Sampler Flickr Group

If you are following along with the Monochromatic Sampler, I have set up a flickr group where you can share pictures and discuss things to do with the Sampler.


I've made a dodgy logo to go along with the Sampler as well (clear to see that I don't have good photoshop skills).


The process goes like this (for blogger blogs):
  1. Log into your blog.
  2. Go to the Layout tab.
  3. Click on Add Gadget, choose Text.
  4. From the dialog box you should see a list of gadgets that are classed as Basic. Choose Text by clicking on the plus [+] sign.
  5. Click on Edit HTML and then paste in the Monochromatic Sampler code above.
  6. Save and voila! You now have an icon on your blog that tells people you are a part of the group! Click on the icon to test it and it should take you to the Flickr group.
Don't forget to let us know if you are joining in on the Sampler fun by leaving a comment. Feel free to join along for one or two blocks or the whole quilt, but remember to post your block images to the flickr group.

The blocks don't have to be black and white, this is just the colour scheme that I have chosen to adopt because of the new baby.

Tuesday, 25 January 2011

Monochromatic Sampler: Block One Tutorial

I started doing the blocks for my Monochromatic Sampler on Saturday and since then have unpicked and re-sewn them. Why? I bought myself a 1/4 inch seam foot for my machine and I have decided that I don't like it. I would much rather use the regular foot, my masking tape seam allowance and press and trim to make sure that I get the fabric widths right. It does mean that I end up with lots of off cuts. But my daughter and her craft table doesn't seem to mind!


I guess I started with a simple block. For this one I cut two strips of 1 1/4 inch width sashes from your fabric. Or one 2 1/2 inch sash in half from a Jelly Roll.

First Row

For this block I started in the centre and I worked out. Cut two strips of 1 1/4 inch width pieces of fabric with your rotary cutter and rather than cut each section exactly, sew and trim.


Second Row

Once your first row is completed, press and trim and continue on with the sewing. Because this block is quite fiddly, rather than double back at the end of each row, reduce the stitch length. I use a little scrap of fabric at the end of each row that I sew onto after I have finished my stitching to hold the thread and reduce thread waste.

Third Row

It is important inbetween each row to square up your sides and make sure that your block has right angles.

Fourth Row

I decided that I would press my seams into the black areas of these blocks rather than press them open. Why? Given that I am dealing with so much white, it just looked neater and it makes the black sections look raised. I haven't decided what type of quilting to do just yet.


Fifth and final row

The last row is in 2 1/2 inch sashes. I fear that when I have all the blocks done, I will then trim this down, but until I know the exact sizes of my blocks this is what I am running with.


Finished width for my block was 10 3/4 inches which I might trim down to 10 1/4 once all the other blocks are done for the wall hanging.

Sunday, 23 January 2011

Monochromatic Sampler

I've been kicking around a few ideas for a quick quilt project for the new baby. I remember reading all about infant eye developement when we had Victoria and how when babies are born they cannot see in colours, only black and white. As their eyes develop, they can see grey and then depth perception develops.

Using the following site as inspiration, it seems like an ideal opportunity to do a touch of quilting with some techniques that I haven't used before, such as creating a pin wheel. There is only one block that is appliqued, which is the stars. Every other block is using patchwork techniques, hence the idea of calling it a sampler.


Given that I am not a "deer and bunnies" quilter, a monochromatic quilted wall hanging beside the cot seems like a good idea to me. I haven't quite got my head around how I might join these pieces, but I might start making the blocks and see where it leads me.

I have two weeks to finish this project!

Thursday, 20 January 2011

My creative space ...

I've been struggling with trying to get my creative space cleaned up for this Saturday. I have a few quilting friends coming over for a day of frivolity, sewing and Colin Firth. I might have to enlist my hubby tonight for one last "push" so that I can get that floor cleaned and the cutting desk cleared.


One thing that I have move past, is wanting for everything to be perfectly organised the first time. So I told myself, so long as the material is folded and stacked, it is good enough. The next "round" of tidying will be in similar colour collections and similar sizes. The fat quarters seem to be under control, but the yardage needs a good going over and serious organisational thought.


The days are ticking by and I am 20 days outbound from my due date and boy does it feel like it. I had all these dreams for what I wanted to sew when I stopped work, but I seem to be quite sore on the front of my belly (placenta at the back this time), which means that sitting at the sewing machine is not as enjoyable as it was last time I was 8 months pregnant.

For more creative spaces, click onto Kootoyoo to see who else is playing this week.

Sunday, 16 January 2011

Re-covering a lamp Tutorial Part 1

For a while now I have been looking for a lamp for my daughters room. Something that fits in with the robot themed wall and paintbox quilt (yet to be finished). I thought that given that it was Christmas time, that there would be plenty to choose from in the shops. But the choices were limited and the prices ridiculous.


When I saw this lamp at Kmart, I knew that it was crying out for a "hack". The lamp is a 38cm Lotus Lamp, which cost me $11 AUD, bulbs were aout $2.

First thing that I did was trace the shape of the lamp. Laying it down and tracing and rolling it along some paper to give me the basic shape of the lamp. Allowing some space at the top and bottom to fold the fabric around the lamp. My measurements are not exact, drawn free-form.


Then we cut out the fabric for the lamp. Giving it a nice steam press and running a small 2cm strip of interfacing along the side that would be folded under to give it a bit of structure and strength. I chose not to interface the whole lot as I thought that the heat from the lamp might play havoc with it. I got the fabric from GJ's in East Brunswick. If you bought a fat quarter, it would cover this lamp shade.


Once we had cut the fabric, we sprayed it with low-tack quilters spray so that we could re-position it on the lamp face until there were no bubbles. Sewing pegs came in handy at this point.


I used adhesive glue to turn the top and bottom allowances into the lamp then held in place with pegs. The plan now is to use a hot glue gun to secure and some white bias binding to cover the raw edges of the fabric inside the lamp, however, my hot glue gun decided to kick the bucket :-(


So there will be an emergency trip to Spotlight tomorrow (dangerous I know) so that I can glue up and finish the lamp. Then I might make nice matching patchwork placemat to sit the lamp on for her bedside table.